
Your landlord has three rules: no holes, no hooks, no drama. But you also have a blank white wall staring at you every morning and the very reasonable desire to not live inside a beige cube.
Here’s the truth most decor content skips over: renting does not mean living in a space that looks like a temporary waiting room. It means being strategic. The tools, techniques, and products available today — damage-free adhesives, removable wallpapers, tension systems, leaning furniture — have completely changed what’s possible without ever picking up a drill.
Below are 32 ideas that work in real rentals, for real renters. Some cost next to nothing. Some are weekend projects. A few are investment pieces that will follow you from apartment to apartment for years. All of them are completely, genuinely renter-friendly — no holes, no residue, no awkward conversations with your landlord when you move out.
Before you scroll: if you’re starting from zero and want the fastest transformation, go straight to #1 (Command Strip Gallery Wall) and #5 (Fabric Tapestry). Together, they’ll change how your space feels in a single afternoon for under $60.
1. Command Strip Gallery Wall
What it is: A curated collection of framed artwork, photos, or prints hung entirely with 3M Command picture-hanging strips — no nails, no anchors, no damage.

Why it works: Command strips are the renter’s best friend, and a gallery wall is the single highest-impact wall decor move you can make. It turns blank wall into personality. Done right, it reads exactly like a traditionally nailed gallery — nobody can tell the difference.
How to do it: Plan your layout on the floor first. Trace each frame onto paper, cut out the shapes, tape them to the wall with painter’s tape, and adjust until you love the arrangement. Then apply Command strips to each frame per the weight instructions. Key tip: use the ‘large picture strips’ (holds up to 16 lbs per pair) even for lighter frames — they remove more cleanly than the small ones.
Best for: Frames up to 24″ x 30″ and under 16 lbs. Mix canvas prints, shadow boxes, floating frames, and mirrors for dimension.
Pro tip: Warm the strips with a hair dryer for 20–30 seconds before peeling when it’s time to move out — they release without tearing paint every time.
Cost: $15–$25 for Command strips; frame costs vary. A 6–8 piece gallery can be done for $60–$120 total.
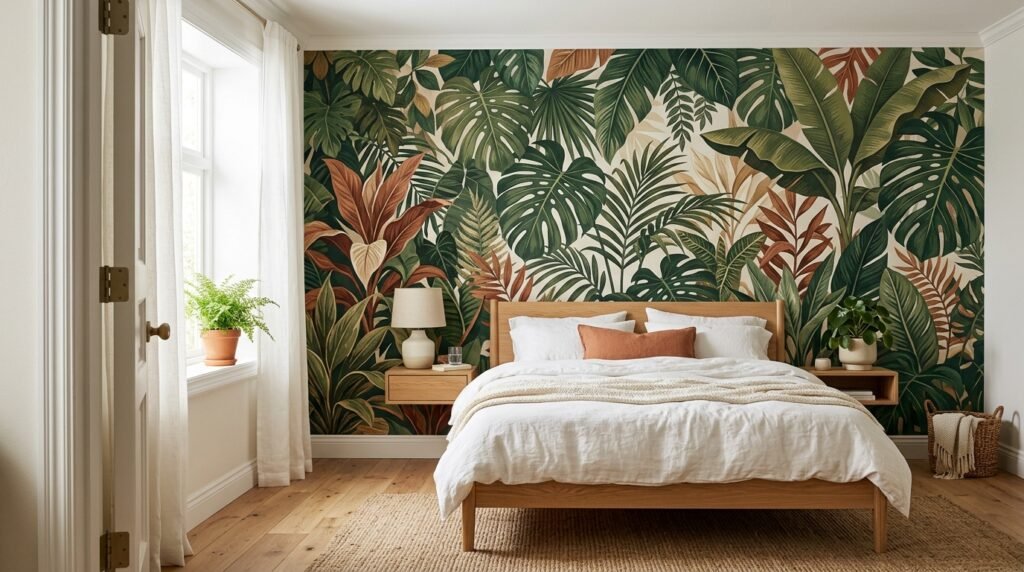
2. Peel-and-Stick Wallpaper Accent Panel
What it is: Removable, self-adhesive wallpaper applied to a single wall or section of a wall to create a bold focal point — think a headboard wall, the wall behind a TV, or the entry alcove.
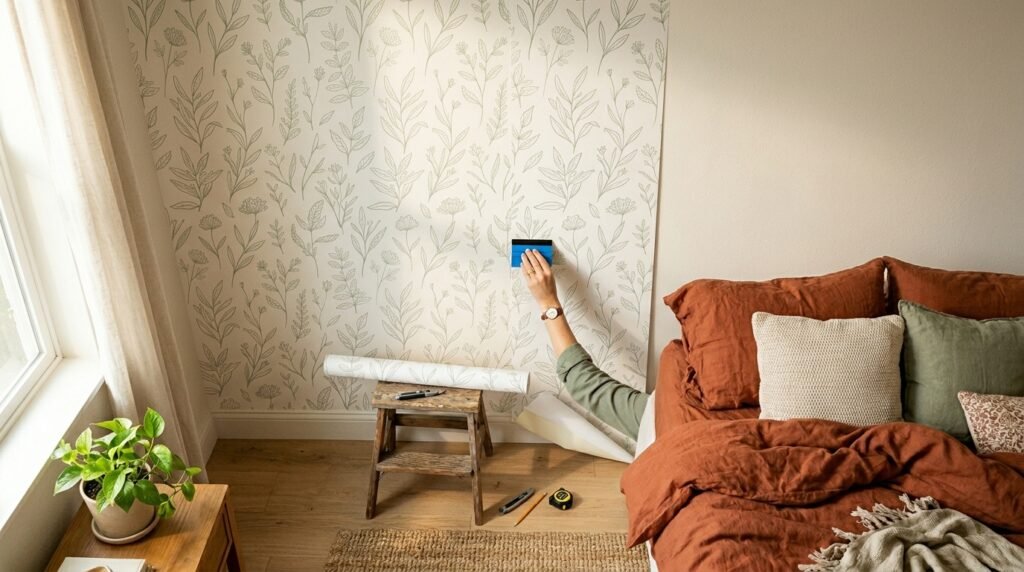
Why it works: A single accent wall shifts the entire mood of a room. Peel-and-stick wallpaper has become genuinely good — thick, bubble-resistant, and designed to come off cleanly on painted drywall. It’s the fastest way to go from ‘generic rental’ to ‘intentionally designed space.’
How to do it: Clean the wall with a slightly damp cloth and let it dry completely. Start from the top, use a squeegee or credit card to smooth as you go, and overlap seams by about 1/8 inch for a seamless look. When removing, use slow, steady downward pulls at a low angle — never yank.
Best materials: Chasing Paper, Tempaper, and Hygge & West all make quality peel-and-stick that removes cleanly. Avoid budget rolls from unknown brands — the adhesive can be too aggressive.
Pro tip: Test a small piece in an inconspicuous corner for 48 hours before committing. If paint lifts when you peel it back, the wall finish isn’t compatible and you’ll need to lightly seal the wall first with a thin layer of paint.
Cost: $2–$6 per square foot. A standard accent wall (roughly 12 ft wide x 9 ft tall) runs $200–$400 in quality materials.
3. Leaning Floor Mirror
What it is: An oversized mirror (typically 60–72 inches tall) propped against the wall at a slight lean — no mounting hardware required.
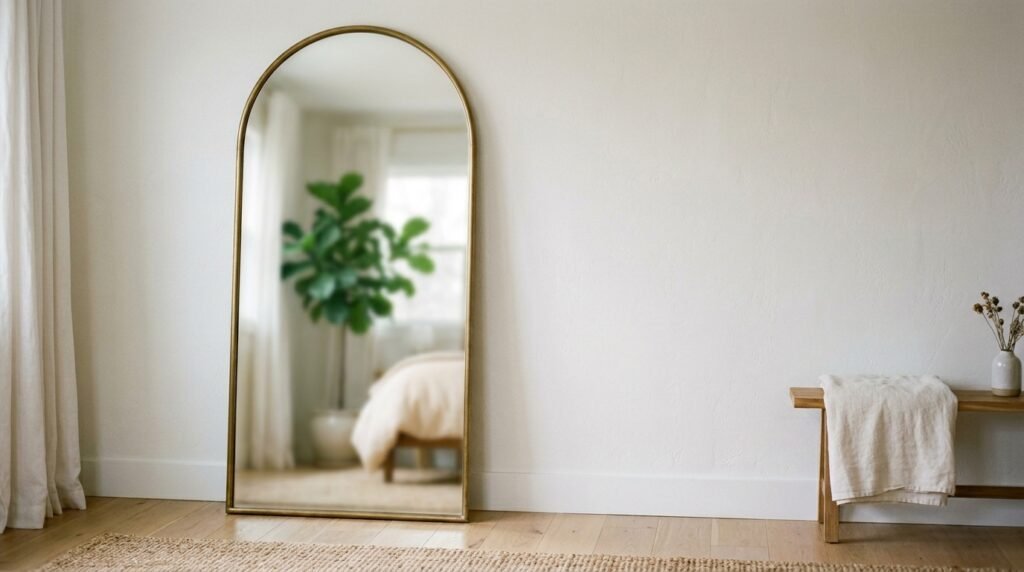
Why it works: A large leaning mirror does three things simultaneously: it acts as a major piece of wall decor, it makes the room feel bigger, and it adds light. It’s one of the most versatile pieces you can own — it works in a bedroom, living room, entryway, or hallway.
How to get it: Look for full-length mirrors with a thin, architectural frame — arched, rectangular, or minimal metal. IKEA’s Hovet mirror (59″x78″) is a classic budget pick. For a step up, try West Elm or CB2 arched options.
Safety note: Always place a rubber furniture pad or anti-slip mat behind the base so it can’t slide. If you have kids or pets, anchor it to the baseboard with a small brace or lean it into a corner for extra stability.
Pro tip: Angle it slightly away from the wall at the top — a 5-degree tilt makes the room appear longer and gives it a more intentional, boutique-hotel look versus a flat lean.
Cost: $80–$400 depending on size and frame quality. A good leaning mirror is a lifelong piece — buy once, move it everywhere.
4. Washi Tape Wall Art or Geometric Mural
What it is: Decorative Japanese masking tape (washi tape) used to create geometric patterns, grid lines, abstract art, or even faux frames directly on the wall. It peels off cleanly and leaves zero residue.
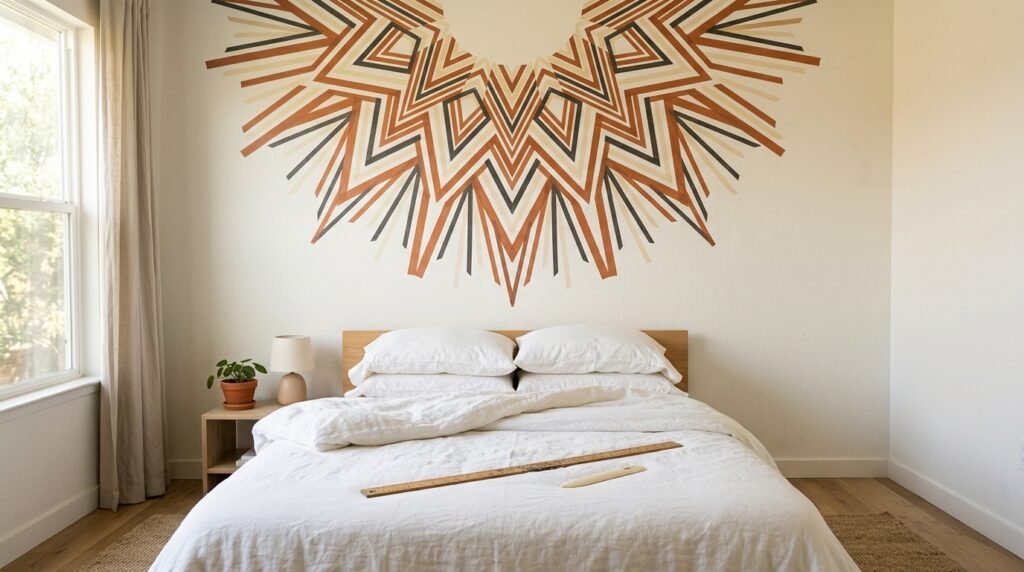
Why it works: Washi tape is one of the few options that lets you be genuinely creative and experimental — because there’s no cost to wiping it and starting over. It’s especially powerful in small rooms where a geometric pattern adds dimension without taking up any floor space.
How to do it: The most popular approaches are: (1) create a large-scale geometric pattern using a long ruler and level; (2) outline a faux gallery wall grid with tape instead of frames; (3) make a sunburst or chevron pattern above a bed or couch. Use a level for any lines meant to be straight — eyeballing always shows.
Best materials: MT tape and Scotch Expressions Washi in widths from 6mm to 25mm. Mix widths for visual interest.
Pro tip: Press along the full length of the tape firmly with your fingernail or a bone folder for the cleanest edge. When removing, pull back slowly at a 45-degree angle — it takes off cleanly even on flat paint if you’re patient.
Cost: $3–$8 per roll. A full wall treatment costs $15–$40 in tape.
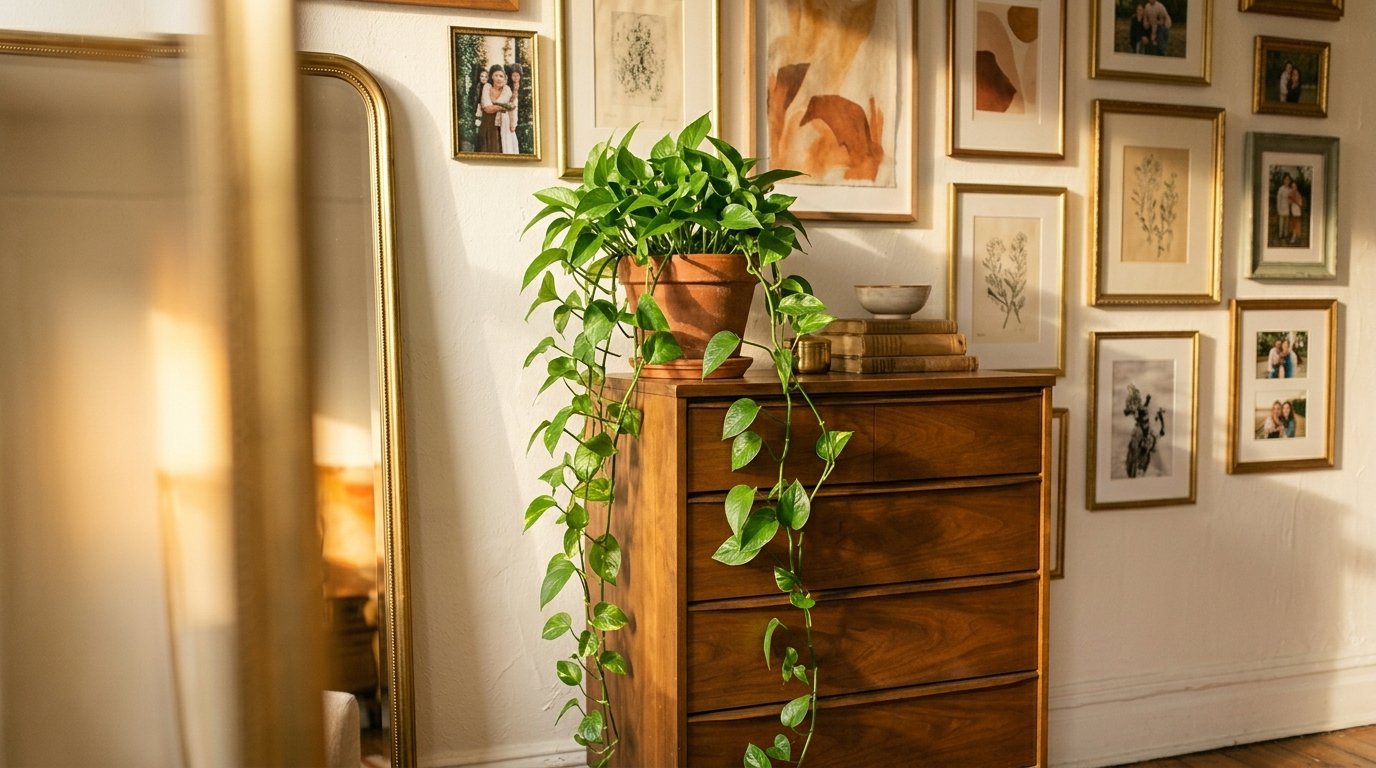
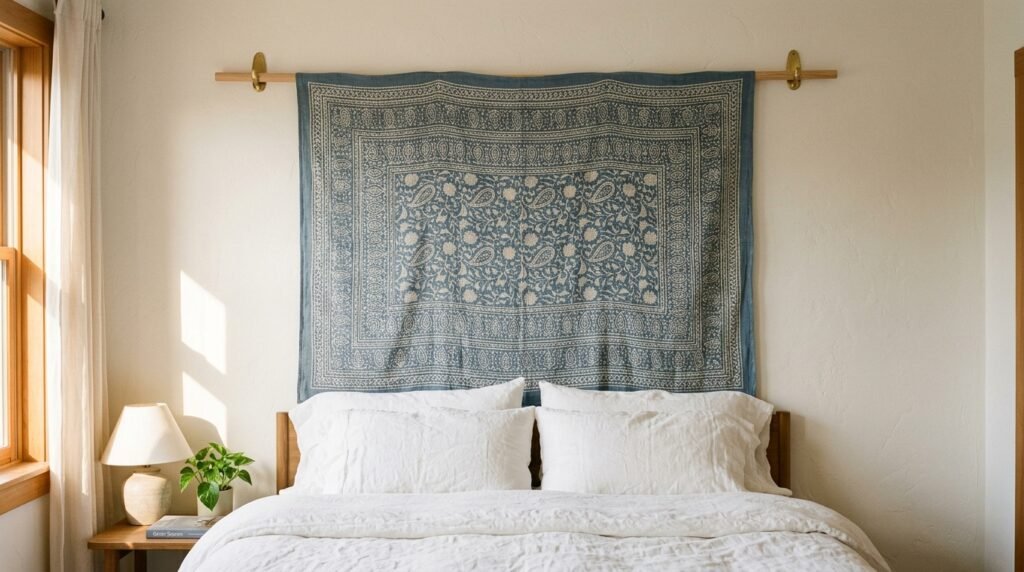
5. Fabric Tapestry
What it is: A large piece of decorative fabric — printed, woven, or macrame — hung on the wall using a wooden dowel, curtain rod, or simple Command hooks, creating a textile focal point.
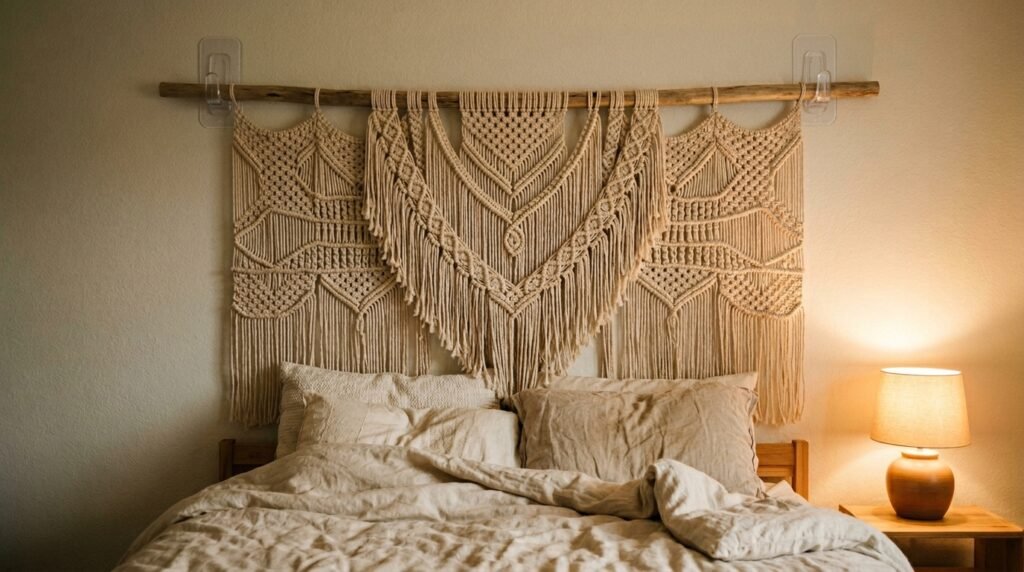
Why it works: Tapestries cover a lot of wall with a single piece. They add texture and warmth that prints and photos can’t replicate, they muffle echo in bare apartments, and they’re completely portable. One good tapestry can anchor an entire room’s aesthetic.
How to hang it: For woven or printed tapestries with a rod pocket, thread a wooden dowel through and hang the dowel on two large Command hooks. For tapestries without a rod pocket, use binder clips or fabric clips attached to a curtain rod. Gravity and a wide base do most of the work.
Best for: Above a bed as a headboard substitute, on a bare living room wall behind a sofa, or as a room divider in a studio apartment.
Pro tip: An oversized tapestry (at least 60 inches wide) reads as intentional decor. Anything smaller can look like a dorm-room afterthought unless you’re using it as part of a layered arrangement.
Cost: $25–$120. Handmade macrame tapestries from Etsy run $80–$200 but are genuinely one-of-a-kind pieces.
6. Removable Vinyl Wall Decals
What it is: Pre-cut adhesive vinyl designs — botanical illustrations, abstract shapes, quotes, geometric elements — that peel-and-stick onto walls and remove cleanly.
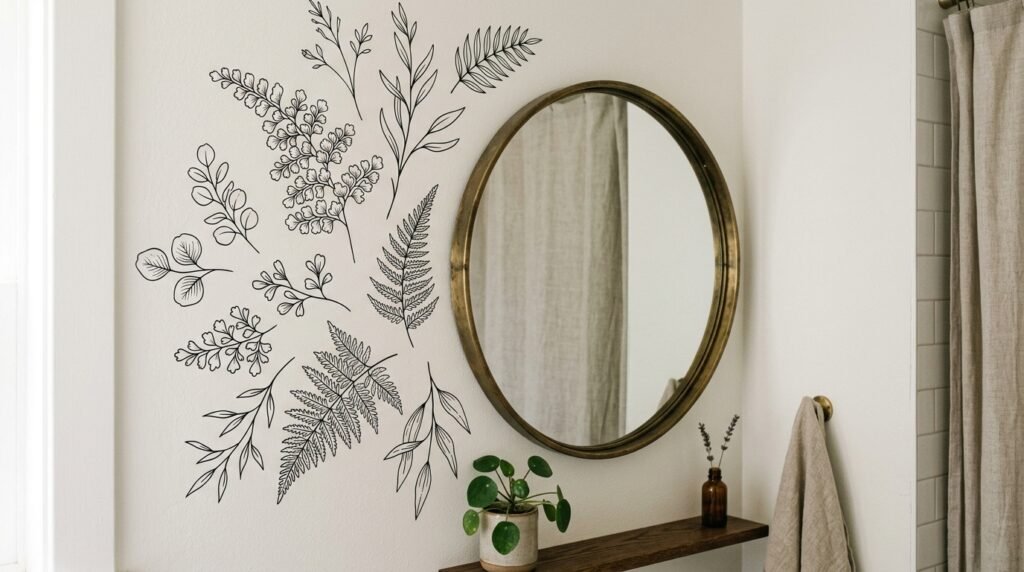
Why it works: Decals let you add a designed element to a specific spot — above a desk, on either side of a window, in a bathroom corner — without the commitment of wallpaper. They’re particularly useful in small or awkward spaces where you want a decorative moment without overwhelming the room.
How to apply: Clean the wall surface, peel the backing, apply transfer tape side up, squeegee from the center outward, then slowly peel back the transfer tape at a low angle. Take your time — rushing causes bubbles.
Best sources: Etsy has thousands of custom decal makers. WallsNeedLove and Blik are reliable brands for contemporary designs. Avoid cheap generic decals — the vinyl is thin and tears on removal.
Pro tip: Skip quote decals in trendy fonts — they date a room within two years. Botanical line drawings, abstract brush strokes, and simple geometric forms age much better.
Cost: $15–$80 depending on size and complexity.
7. Macrame Wall Hanging
What it is: A hand-knotted fiber artwork, typically made from natural cotton rope, hung on a wooden dowel and mounted with a single Command hook.
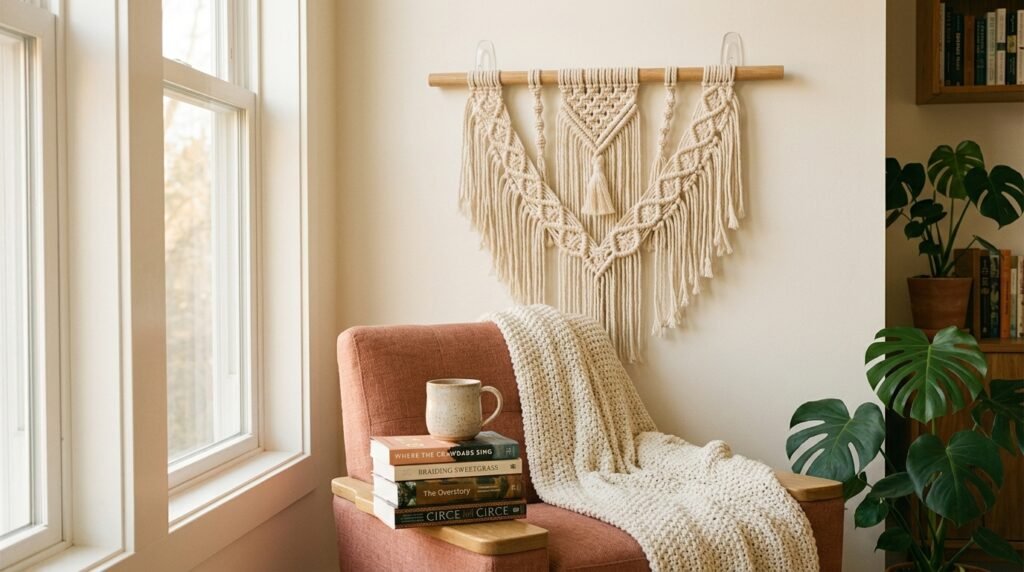
Why it works: Macrame adds a tactile, handmade quality that no print or digital art can replicate. The texture reads beautifully in photography, it works in virtually every aesthetic from boho to Scandinavian minimal, and a good piece becomes a genuine conversation starter.
How to hang it: One large Command hook (the clear 5-lb variety) is enough for most medium macrame pieces. For larger, heavier pieces, use two hooks and a wooden dowel. Make sure the dowel is at least 6 inches wider than the piece on each side so it doesn’t sag.
Best for: Above a bed (skip the headboard entirely and let the macrame be the headboard wall feature), in an entryway, or in a corner between two walls for a gallery-nook effect.
Pro tip: Natural undyed cotton ages beautifully. Avoid pieces with synthetic fibers or bright dyed colors — the texture is where the beauty lives, and busy colors compete with it.
Cost: $30–$60 for a solid Etsy piece; $150–$400+ for large artisan work. You can also DIY for $15–$25 in rope if you’re willing to spend a few hours learning basic knots.
8. Wire Grid Panel / Memo Board
What it is: A powder-coated metal grid panel (typically 14″x20″ up to 24″x36″) used as a functional display board — hung with Command hooks and outfitted with S-hooks, clips, and small baskets to hold photos, plants, notes, and small objects.
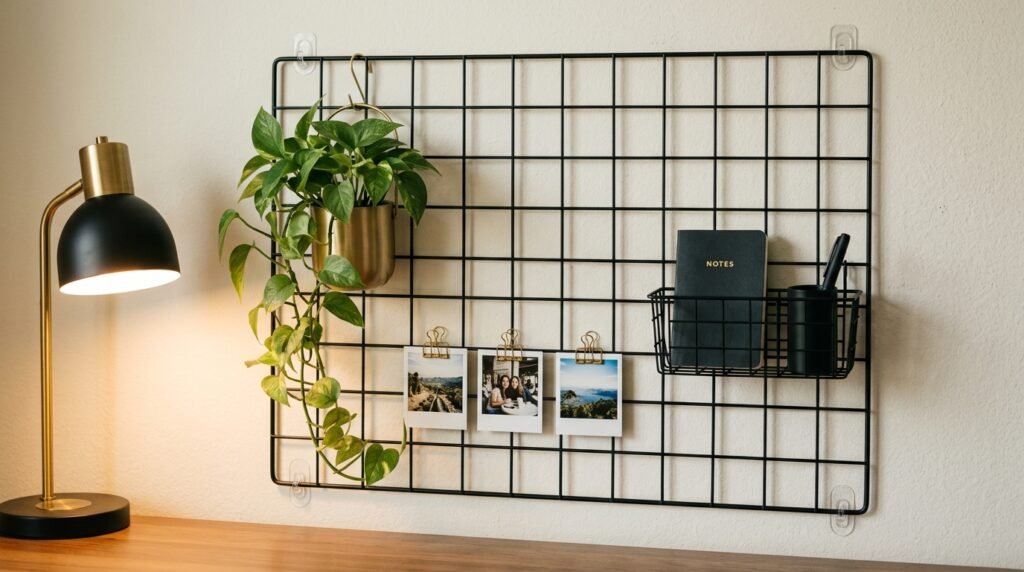
Why it works: Wire grids do double duty as decor and organization. They’re especially powerful in small apartments where you want wall space to serve a purpose. They also evolve — you rearrange what’s on them seasonally so the wall never looks stale.
How to hang it: Two large Command hook sets at the top corners. Make sure you’re using the adhesive rated for the combined weight of the grid plus everything on it. For heavier grids (with multiple baskets and plants), reinforce with a third hook in the center.
Best for: Home office areas, kitchen walls, bedroom command centers, entryway organization.
Pro tip: Keep the grid’s accessories in a consistent metal finish — all black, all brass, or all chrome. Mixed metals on a wire grid reads as chaos rather than collected.
Cost: $20–$60 for the grid; $10–$30 for accessories.
9. String Lights with Command Hooks
What it is: Warm Edison bulb string lights or globe lights draped across a wall in a deliberate arrangement — cascading from above a bed, framing a window, or looping in a loose pattern across a feature wall — all anchored with small Command hooks.
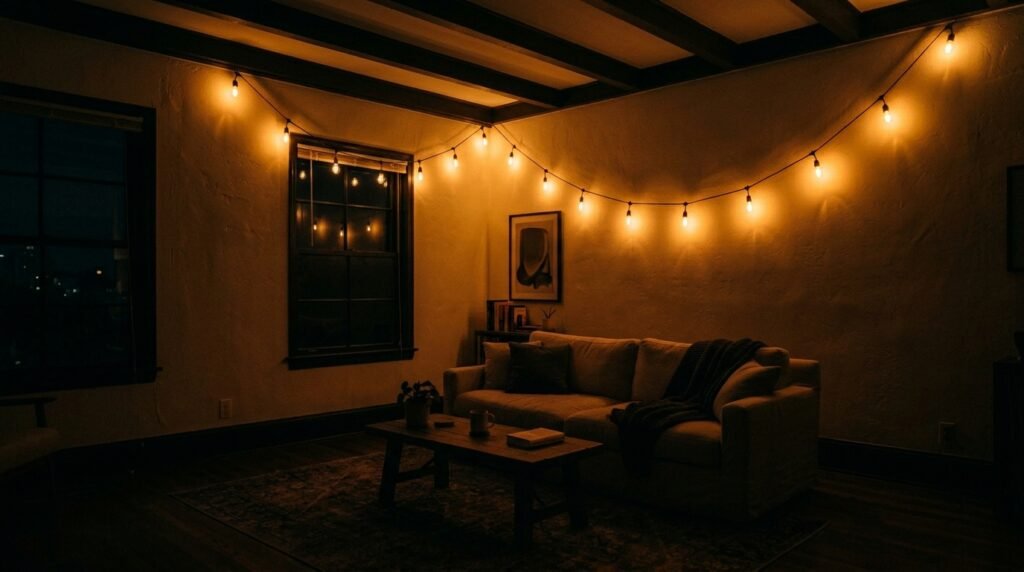
Why it works: String lights are one of the cheapest ways to completely transform the feeling of a room. They create warmth and depth that no overhead light can match. More importantly, they’re decor that also functions — they become ambient lighting for evenings when overhead lights feel too harsh.
How to set it up: Map out your drape pattern first. Use the smallest Command hooks (the mini clear ones designed for lightweight items) every 18–24 inches to keep the line from sagging unevenly. Plug into a smart plug so you can control them without touching a switch.
Best lights: Warm white (2700K) Edison-style bulbs on a black or clear wire. Avoid cool white (5000K+) — they read clinical rather than warm. Twinkle lights work for certain aesthetics but can tip into seasonal-decoration territory quickly.
Pro tip: Run your lights along a ceiling-wall edge rather than the middle of the wall — it gives the room an architectural glow instead of a string-of-lights look.
Cost: $15–$40 for quality string lights; $1–$3 for Command hooks.
10. Leaning Ladder Display
What it is: A wooden or metal decorative ladder propped against the wall and styled with art prints, hanging plants, blankets, or framed photos.
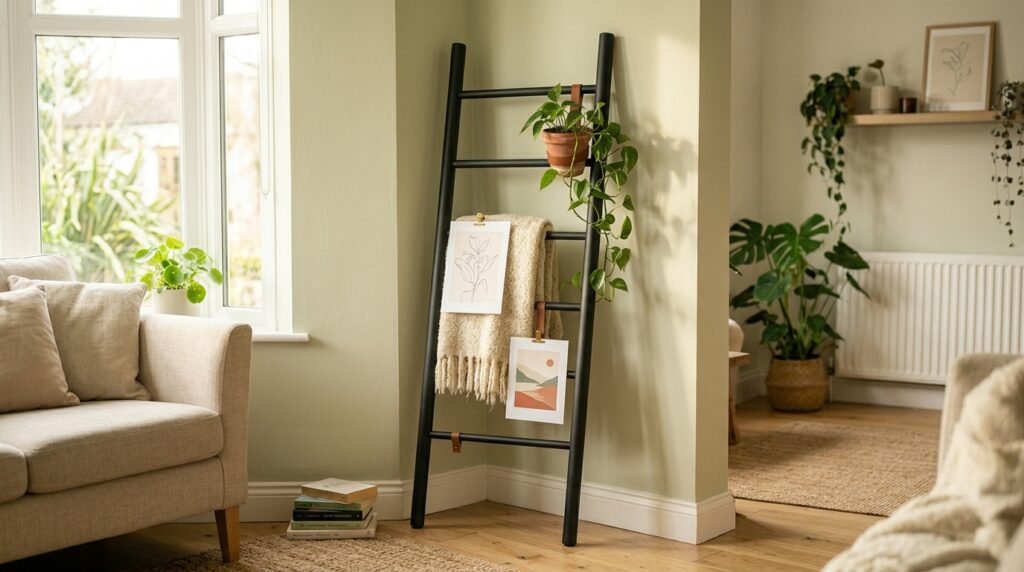
Why it works: A leaning ladder fills vertical wall space without attaching to anything. It’s particularly useful for renters who want a gallery feel but don’t want to commit to a fixed wall arrangement — you can restyle the ladder in minutes as your taste evolves.
How to style it: Hang art prints from the rungs using simple binder clips or leather loops. Drape a textured throw blanket over one rung. Add a small air plant or trailing pothos in a simple pot clipped to a rung. Keep it edited — three to five items maximum for a curated look.
Best for: Living rooms and bedrooms where you want a vertical statement piece that also functions as a display shelf.
Pro tip: Position the ladder so it leans toward a corner slightly — it’s more stable and the corner relationship makes it look placed rather than propped. A round-backed chair nearby completes the vignette.
Cost: $40–$120 for a solid wood or matte-black metal ladder.
11. Freestanding Pegboard Panel
What it is: A pegboard mounted in a freestanding frame or propped on shelf brackets so it stands on its own, rather than being drilled into the wall.
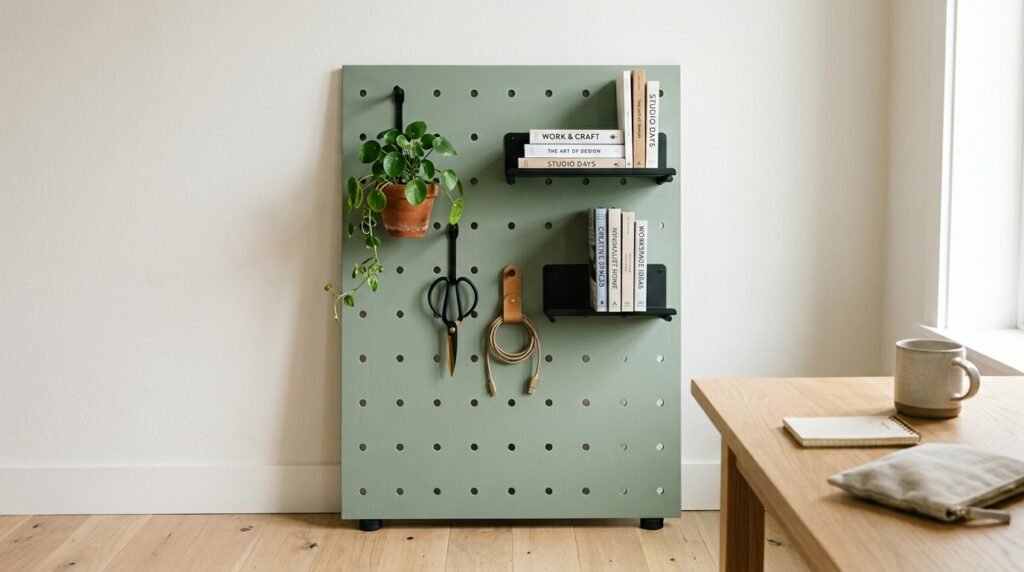
Why it works: Pegboards are infinitely customizable — hooks, shelves, baskets, bins, and rails can be repositioned endlessly. A freestanding version gives you all that flexibility without a single hole in your wall. It’s especially valuable in small spaces where you need wall-like storage without actual wall access.
How to build it: You can buy pre-framed pegboard panels, or frame your own by attaching 1×2 lumber around the edges and across the back to create a frame that stands when leaned against the wall. Add rubber feet to the bottom to prevent sliding.
Best for: Home offices, craft rooms, kitchens, and bedrooms as a jewelry/accessory organizer.
Pro tip: Paint your pegboard before adding accessories — the standard gray-brown factory color works against most room aesthetics. Matte white, sage green, or deep navy all make the accessories pop.
Cost: $30–$80 for a DIY framed version; $60–$150 for pre-made freestanding options.
12. Cork Tile Squares
What it is: Self-adhesive or tape-mounted cork tiles arranged in a grid on your wall, creating a functional pinboard surface where you can push in photos, cards, notes, and lightweight art with pins — without damaging the actual wall.
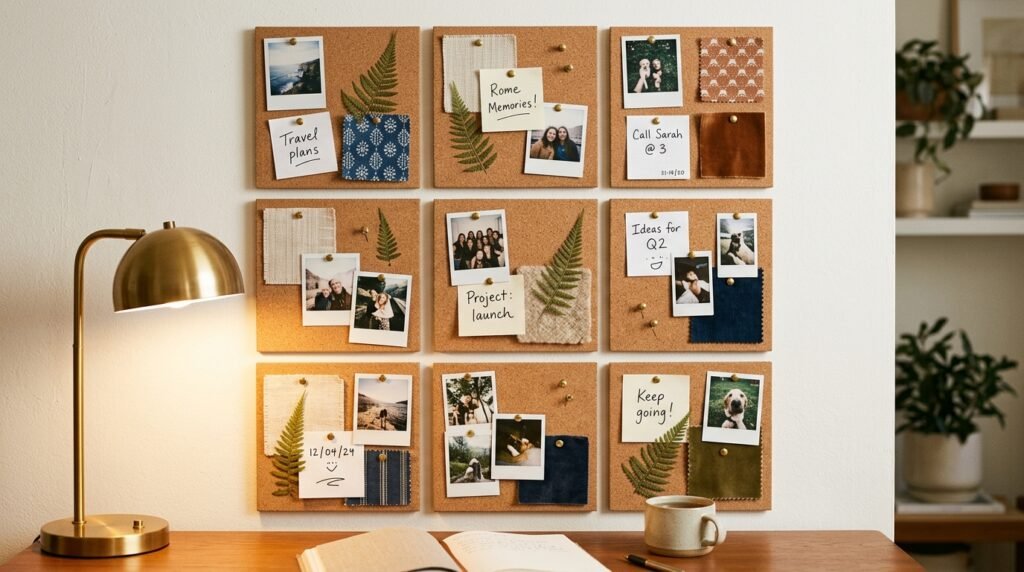
Why it works: The cork absorbs all the pin damage so your wall never does. You get the full functionality of a traditional bulletin board without drilling a single mounting hole. In a home office or bedroom, cork tiles become a living, evolving display that changes as you do.
How to mount them: Either use the self-adhesive backing that comes on some cork tiles, or apply your own adhesive mounting strips (like Command strips cut to size). For extra security along top edges, a thin strip of washi tape in a matching neutral color acts as a subtle reinforcement that’s easy to remove.
Best for: Home office walls, kitchen message centers, bedroom mood boards.
Pro tip: Use 12″x12″ cork tiles rather than one large cork board — the tile grid pattern looks more intentional and designed. Arrange them in a 2×4 or 3×3 arrangement for maximum visual impact.
Cost: $20–$40 for a set of 12 tiles.
13. Damage-Free Floating Shelves
What it is: Slim display shelves mounted using adhesive strips (Command or similar) rated for the shelf and its contents, or specialized adhesive shelf systems designed explicitly for rental use.
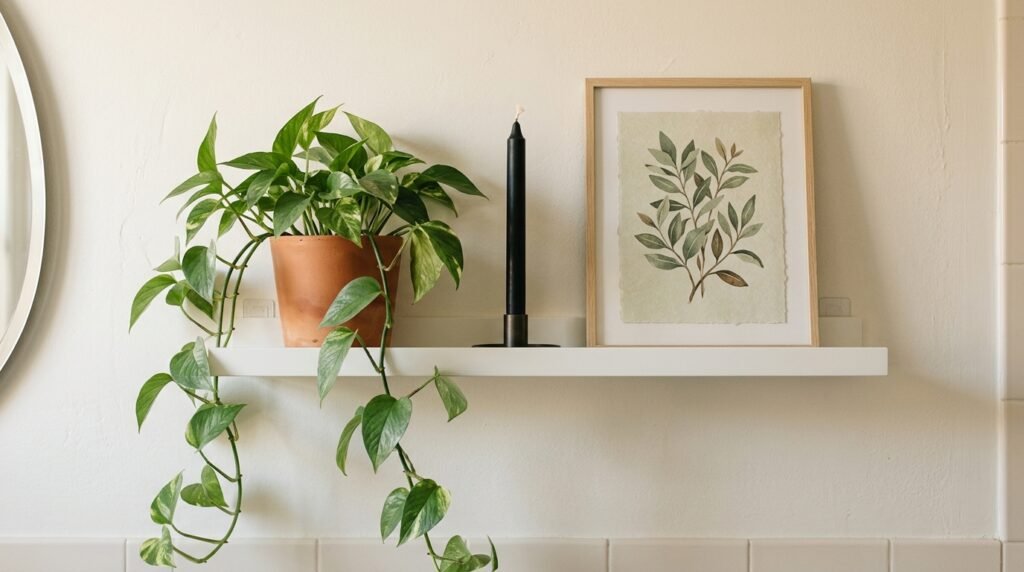
Why it works: Floating shelves immediately make a wall look purposeful. They create space for plants, books, candles, and small objects — turning a dead wall into a living, layered display. Damage-free versions have come a long way and now reliably hold 5–15 lbs per shelf when properly installed.
How to install: iSPECLE and WELLAND make adhesive-mounted shelf systems specifically designed for this. Read the weight ratings carefully and install on clean, flat, painted drywall (not textured surfaces). For best adhesion, clean with rubbing alcohol first and wait 72 hours before loading.
Best for: Bathroom walls, bedroom nightstand alternatives, living room display walls, kitchen herb shelves.
Pro tip: Use your shelves for things with natural weight variation — mix a heavy ceramic pot, a lightweight print leaned against the wall, and a few small objects. Shelves loaded with exclusively books or exclusively heavy pots put too much stress on adhesive mounts.
Cost: $25–$70 per shelf system.
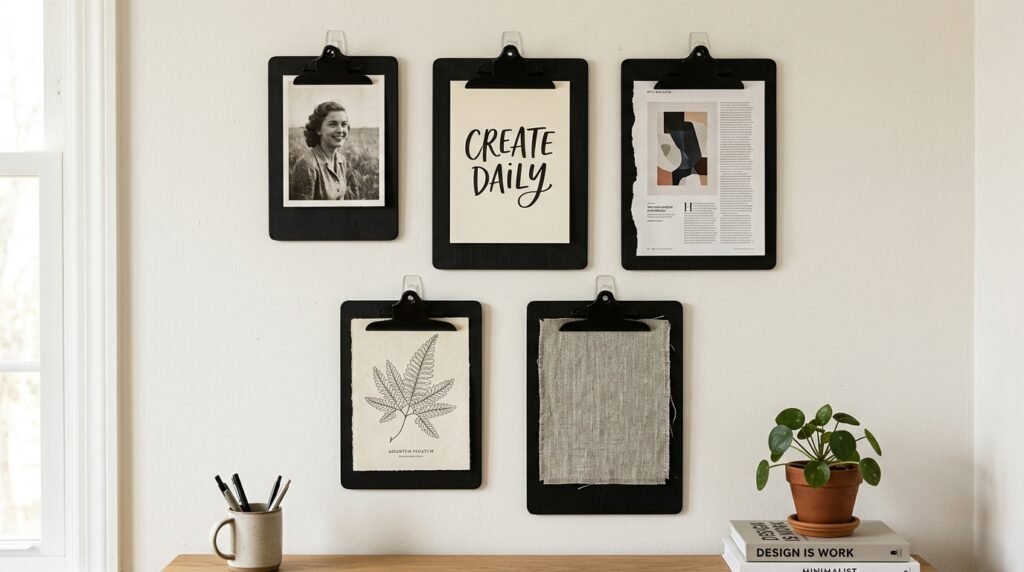
14. Clipboard Gallery
What it is: A group of three to six clipboards mounted on the wall with Command hooks, each holding a photo, print, postcard, or piece of flat art. The clips allow you to swap out artwork anytime in seconds.
Why it works: It’s a rotating gallery system built for people who love changing things up. No frames, no re-hanging, no re-arranging — just open the clip and slide in something new. It also has a graphic quality that works beautifully in home offices and creative workspaces.
How to set it up: Mix clipboard sizes — A5 and A4 creates a natural rhythm. Paint the clipboards in a single color (matte black is the most versatile) or keep them natural wood. Hang each one with a single small Command hook through the top hanging hole.
Best for: Home offices, children’s rooms (update with their drawings weekly), studio apartments where you change your decor mood frequently.
Pro tip: Don’t use all the same artwork — mix black-and-white photography, a hand-lettered card, a fabric swatch, and a torn magazine page. The eclecticism is the point.
Cost: $15–$30 for a set of clipboards; $5–$10 in Command hooks.
15. Photo Line with Clips
What it is: A length of string, wire, or jute rope hung horizontally between two Command hooks, with wooden or metal binder clips hanging from it to display photos, polaroids, art prints, or postcards.
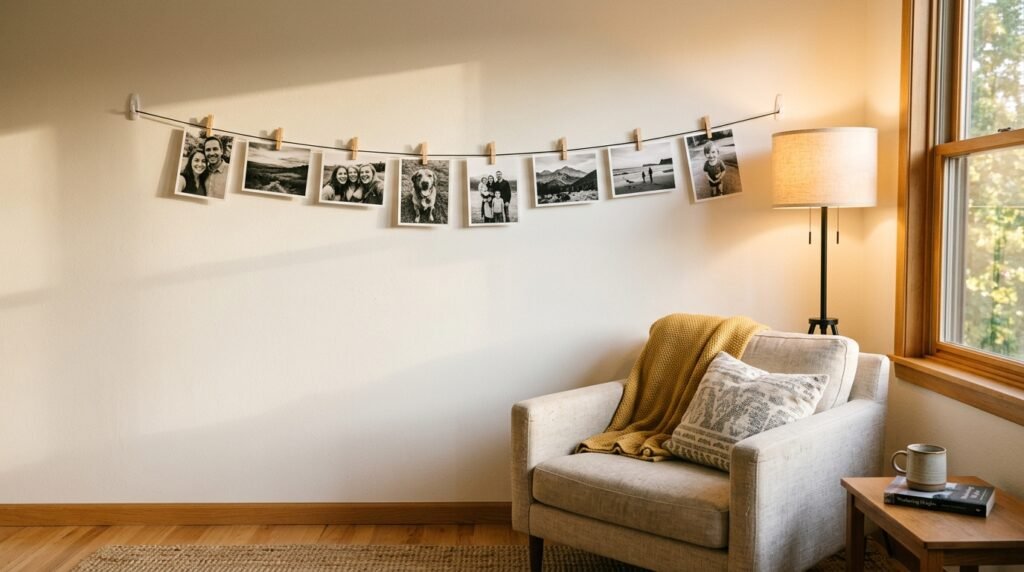
Why it works: A photo line is informal, warm, and deeply personal. It makes a wall feel lived-in without looking messy. Unlike a rigid gallery wall, it naturally allows asymmetry and imperfection — which actually makes it look more curated, not less.
How to set it up: Use a long level to make sure your two anchor hooks are at exactly the same height. Natural jute twine or a thin black wire creates different moods — jute for warm/earthy, wire for minimal/modern. Space clips 4–6 inches apart.
Best for: Bedrooms, hallways, reading nooks, home offices behind a desk.
Pro tip: Print photos in black and white only, or use polaroids with their natural warm tones. Mixing different print styles and color temperatures on the same line always looks chaotic.
Cost: $10–$25 total. You likely have some of the supplies already.
16. Large Canvas Art Leaned Against Wall
What it is: An oversized painted canvas (at least 24″x36″ — bigger is better) propped directly on the floor against the wall, as intentional decor rather than a storage waiting spot.
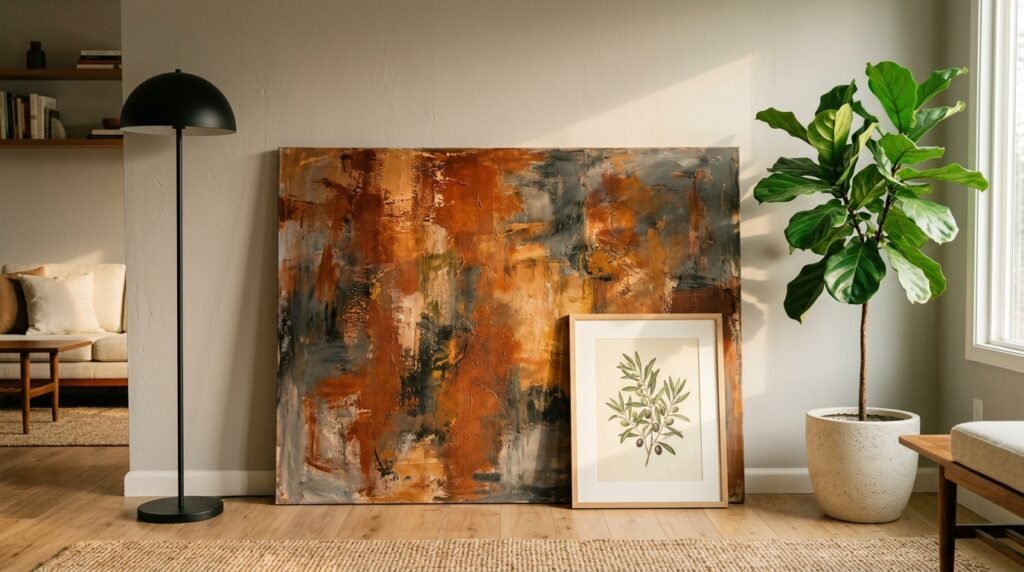
Why it works: Oversized art leaned on the floor is one of the most effortlessly stylish moves in interior design — it reads as relaxed and confident. It works because the scale is large enough to register as a deliberate choice, and the casual lean feels like a studio or gallery.
How to style it: Don’t lean it alone. Layer a smaller framed piece in front of it, slightly offset. Add a tall plant or floor lamp beside it. Create a ground-level vignette that reads as a considered arrangement. The art becomes the backdrop.
Best for: Living rooms, bedrooms, entryways with enough wall length.
Pro tip: The minimum canvas size that reads as intentional on the floor is 24″x36″. Anything smaller just looks like you haven’t hung it yet.
Cost: Original canvas art from Etsy: $100–$600. High-quality canvas print reproductions: $40–$150.
17. Removable Peel-and-Stick Mural
What it is: A large-format printed mural — a scenic view, an abstract color field, a botanical illustration, an architectural print — on removable peel-and-stick material designed to cover a full wall.
Why it works: A full-wall mural transforms a room completely. It creates the illusion of depth, adds a dramatic focal point, and functions as all your wall decor in one piece. Done right, it looks like a custom painted mural from ten feet away.
How to apply: This is a two-person job. Start from the top center, smooth outward and downward with a plastic squeegee. The panels overlap slightly — align the pattern at each seam carefully before pressing down. Take your time with the seams; that’s where most people rush and it shows.
Best sources: Murals Your Way, Photowall, and Rebel Walls all produce quality removable murals with clear installation instructions. Pick a design that fits your room’s natural light — dark, moody murals work in well-lit rooms; lighter, airy designs work in rooms without much natural light.
Pro tip: Before ordering, tape painter’s tape on your wall to the exact mural dimensions and live with it for a few days. Murals that look stunning in a photo can feel overwhelming at full scale in a small room.
Cost: $150–$500 depending on wall size and supplier.
18. Mirror Gallery Wall with Strips
What it is: A collection of different-sized mirrors — sunburst, round, rectangular, beveled — arranged as a gallery wall and hung with heavy-duty Command strips.
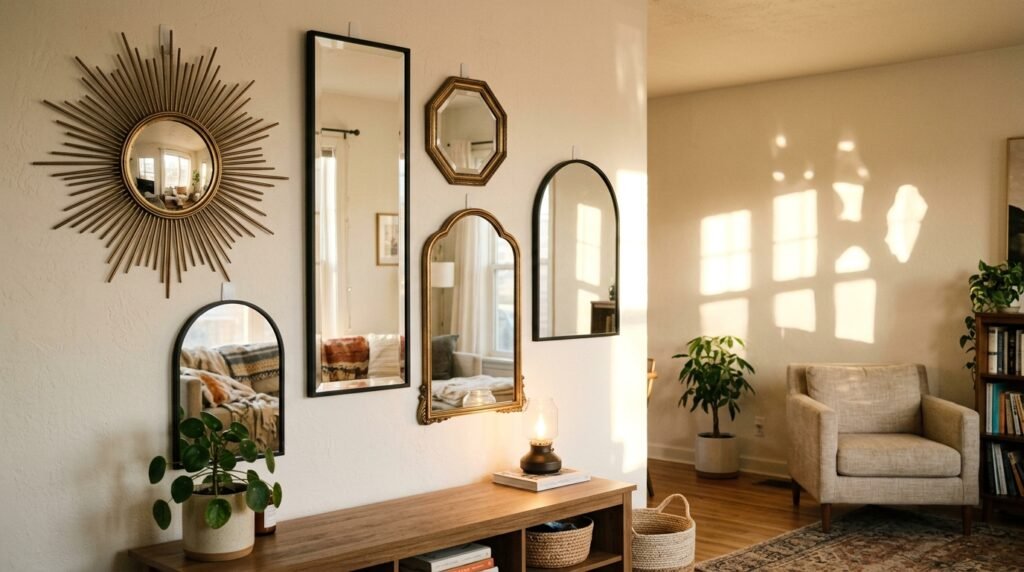
Why it works: Mirrors in a gallery arrangement do everything a regular gallery wall does (personality, visual interest, intentional design) plus they add light reflection that makes the room feel brighter and more spacious. The combination of different shapes creates energy.
How to arrange: Mix at least three different shapes — a round mirror, a rectangular one, and one decorative frame. Lay them on the floor first and photograph the arrangement before committing. Use heavy-duty Command strips rated for the mirror’s weight — never use regular picture-hanging strips for mirrors.
Safety note: Only use Command strips on mirrors up to about 8 lbs. Heavier mirrors should lean rather than hang, or use a mirror with a dedicated D-ring that Command strips can anchor properly.
Pro tip: Odd numbers of mirrors (3, 5, 7) always look more dynamic than even numbers. And vary the spacing — tighter clusters of two with a gap before the next one reads more curated than evenly spaced rows.
Cost: $15–$80 per mirror; a collection of 5 mirrors for $100–$300.
19. Hanging Textile Panel
What it is: A piece of fabric — a vintage sari, a linen print, a hand-dyed panel, a block-print textile — stretched over a wooden frame or hung from a rod using a rod pocket or clip rings, acting as soft wall art.
Why it works: Fabric on a wall adds warmth, acoustic dampening, and a richness of texture that flat art can’t match. In a bedroom especially, a textile panel behind the bed acts as a soft, oversized headboard alternative that completely anchors the room.
How to hang it: Option A — stretch the fabric over a canvas stretcher bar frame and hang like a canvas. Option B — sew or clip a rod pocket and hang from a curtain rod resting on two Command hooks. Option C — clip the top edge to a wooden dowel every 6 inches with binder clips for a clean, casual hang.
Best materials: Block-print cotton, linen in natural tones, vintage kantha quilts, or ikat fabric. Look for flat-weave textiles without too much texture — they photograph better and hang more smoothly.
Pro tip: The fabric doesn’t need to be perfectly flat. A slight wave or drape gives it a more organic, artistic quality — trying to press and tension it perfectly makes it look more like a window treatment.
Cost: $20–$100 for fabric; $5–$20 in hardware.
20. Tension Rod Room Divider with Curtain
What it is: A floor-to-ceiling tension rod (or two rods in a corner) fitted with a curtain or fabric panel to create a soft wall between spaces — separating a sleeping area from a living area, or creating a closet alcove in a studio apartment.
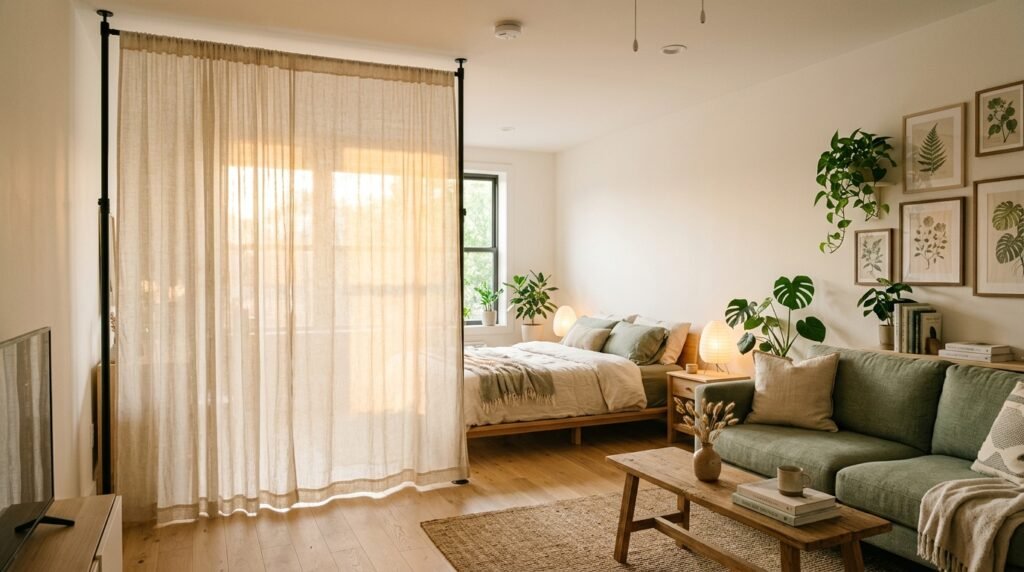
Why it works: For studio apartment renters, tension rods are the closest thing to a free wall. They create zones without permanent construction. They also work as a non-wall decor element — a beautiful fabric panel hung this way becomes architectural.
How to set it up: Spring-loaded tension rods rated for floor-to-ceiling span (look for ones with rubber feet on both ends). Thread with linen, cotton voile, or a textured weave fabric. For heavy fabrics, use a 1-inch diameter rod with additional center support.
Best fabrics: Sheer linen for a light-diffusing effect; thick velvet for acoustic privacy; gauze for a bohemian, layered look.
Pro tip: For a more finished look, use clip-on curtain rings rather than threading the rod through a pocket — it makes the curtain hang more uniformly and lets you adjust easily.
Cost: $25–$60 for the tension rod system; $30–$100 for fabric panels.
21. LED Neon Sign
What it is: A flexible LED sign shaped into words, phrases, or abstract forms mounted on a clear acrylic backing, hung with Command hooks, and plugged into a standard outlet.
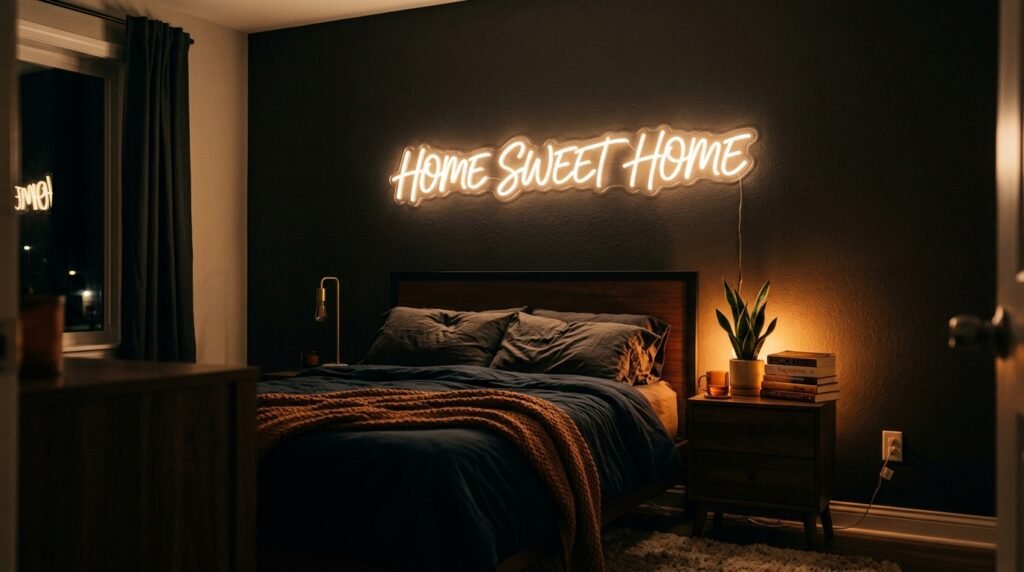
Why it works: A neon sign is instant atmosphere. It functions as ambient lighting and art simultaneously. Modern LED versions run cool to the touch, draw minimal electricity, and come in dozens of typefaces and colors — including warm white options that look elegant rather than loud.
How to hang it: Most come with pre-drilled mounting holes in the acrylic backing. Two large Command hooks through those holes hold most signs securely. A dimmer plug-in (available for $10 on Amazon) lets you adjust intensity based on time of day.
Best for: Bedrooms, home bars or reading nooks, WFH desks, and any wall that needs a warm glow in the evening.
Pro tip: Choose custom neon over stock phrases. Custom LED neons can be ordered in any text on Etsy for $100–$200. A custom sign is personal; a stock ‘good vibes’ sign is visual noise.
Cost: $50–$80 for stock designs; $100–$250 for custom.
22. Peel-and-Stick Brick or Shiplap Panels
What it is: 3D foam panels designed to mimic the look of exposed brick, shiplap wood planks, or stone — peel-and-stick adhesive backing, lightweight enough for Command-strip reinforcement or direct adhesive mounting.
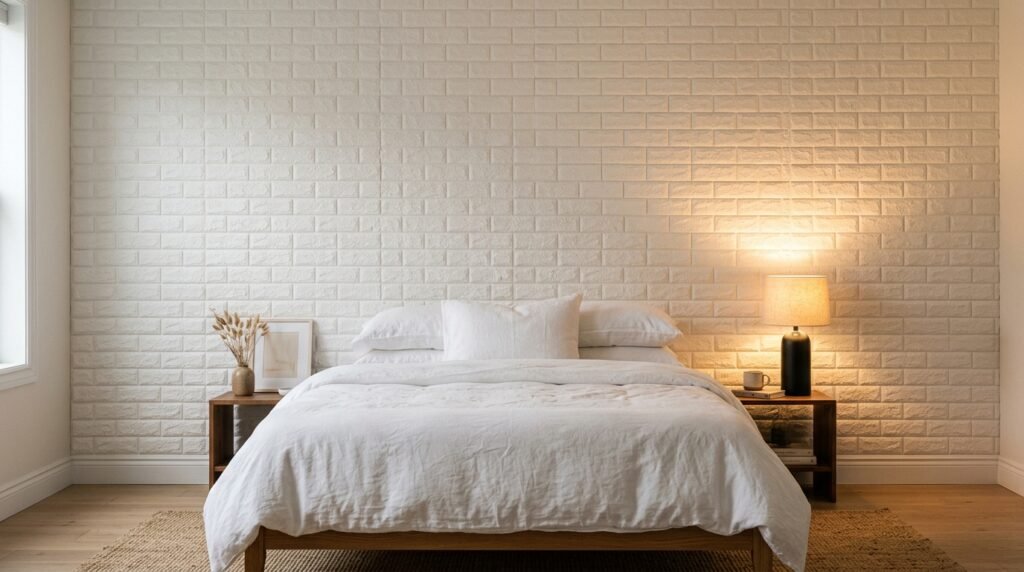
Why it works: These panels add architectural texture that a flat wall can never have. Used on a single wall (not all four), they create the appearance of a structural design choice — exposed brick behind a bed, shiplap behind shelving — without any actual construction.
How to apply: Measure and cut with scissors or a box cutter. Start from the center of the wall and work outward so the panel cuts are even on both sides. Most panels interlock at the edges — align them carefully as you go. Use additional adhesive on larger panels if the self-adhesive backing feels insufficient.
Best materials: Art3d and WallArt make quality 3D panels in multiple finishes. Look for panels with realistic texture depth — avoid designs that look flat; the shadow and dimension are what makes them convincing.
Pro tip: Paint the panels after installation. A coat of flat-finish paint in white, warm gray, or terracotta makes foam panels read as the real material from most angles.
Cost: $2–$4 per square foot — a significant wall can be done for $60–$150.
23. Framed Pressed Botanicals
What it is: Dried and pressed flowers, leaves, ferns, or grasses mounted inside glass frames — either floating frames that show the botanical against a white or black mat, or standard frames with a paper backing.
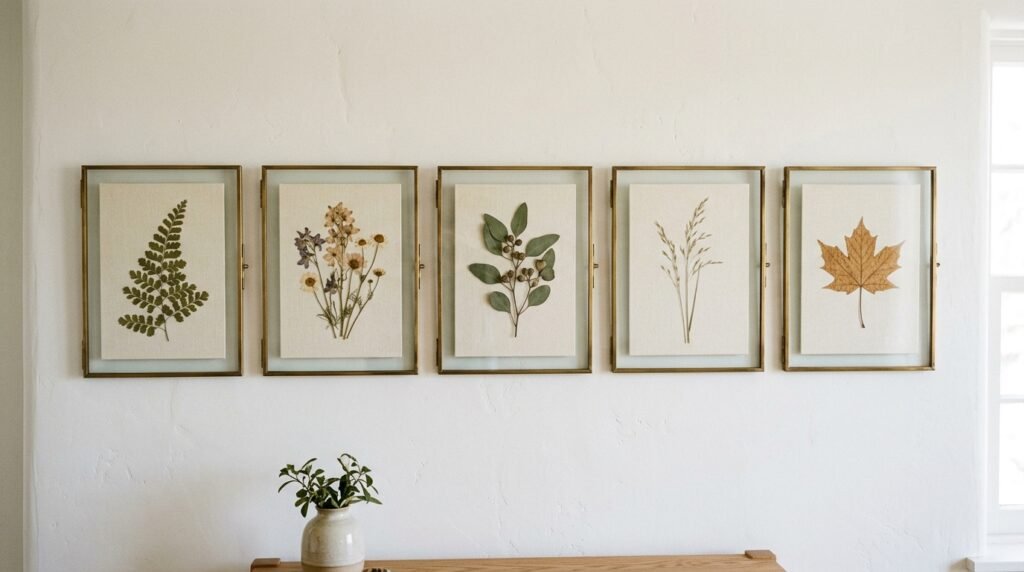
Why it works: Pressed botanicals have an organic beauty that printed art can’t replicate. They’re genuinely one-of-a-kind and they age gracefully — the slight color shifts that happen over time add to their character. A set of three to five matching frames creates a cohesive, gallery-ready installation.
How to get them: Press your own by placing specimens between paper inside a heavy book for 2–3 weeks, or buy pre-pressed specimens on Etsy. Mount using archival washi tape at the corners (not craft glue, which discolors) against a neutral mat board.
Best frames: Use identical frames (same brand, same profile) in either brass, black, or natural wood. Hung with Command strips on a grid arrangement.
Pro tip: Press botanicals from places that mean something to you — a fern from a hike, a flower from a bunch you bought for a birthday. It turns the decor into a memory.
Cost: $5–$30 per frame; pressing your own specimens costs almost nothing.
24. Geometric Metal Wall Sculpture
What it is: A metal wall art piece made of interconnected geometric shapes — hexagons, triangles, abstract lines — typically in brass, copper, or matte black, hung with a single Command hook through the built-in mounting point.
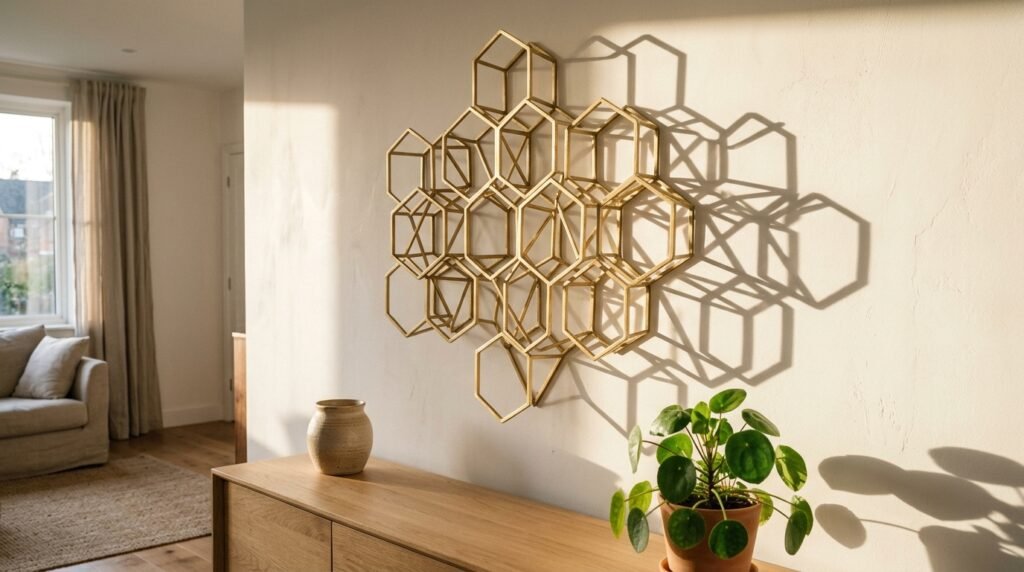
Why it works: Metal wall sculptures add a three-dimensional quality to a wall that flat art never achieves. They cast interesting shadows as light moves throughout the day, creating a dynamic piece that changes appearance from morning to evening.
How to hang it: Most metal wall sculptures weigh under 5 lbs and hang cleanly on one or two large Command hooks. Check the included hanging hardware — most have a traditional keyhole mount that pairs perfectly with Command hooks.
Best for: Living rooms, entryways, dining areas — anywhere you want a statement piece that doesn’t compete visually with other decor.
Pro tip: Brass and warm-toned metals work in rooms with warm lighting (incandescent or 2700K LED). Matte black and silver-tone sculptures work better in spaces with cool or natural light.
Cost: $30–$120 depending on size and material.
25. Book Ledge Shelves with Adhesive Mounting
What it is: Slim, shallow shelves (2–3 inches deep) designed to display books face-out rather than spine-out, mounted with adhesive strips. The books sit at eye level against the wall in a row, their covers acting as rotating art.
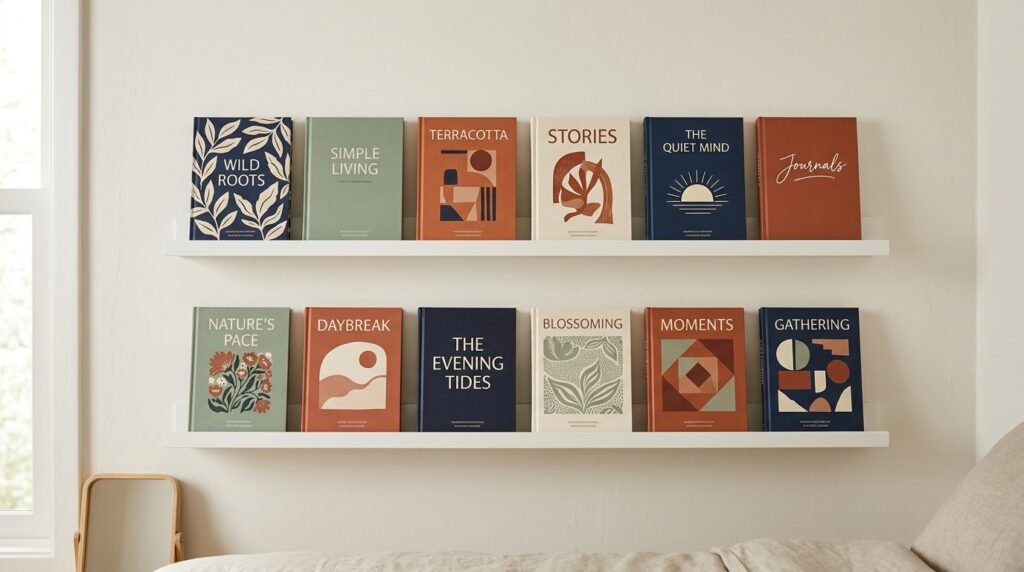
Why it works: Face-out book displays are genuinely beautiful — they turn your reading list into a gallery. As you finish books and pick new ones up, the ‘art’ on your wall changes automatically. And because the shelves are only a few inches deep, they don’t read as traditional shelving — they read as wall decor.
How to mount: IKEA’s Mosslanda picture ledges are the classic option. They can be mounted with heavy-duty adhesive strips on flat drywall. Load each ledge conservatively — 5–6 books maximum per 45-inch ledge using adhesive mounting.
Best for: Living rooms, bedrooms, home offices, hallways.
Pro tip: Edit your books before displaying — only face out books with covers you find beautiful. Keep a ‘B-list’ in a nearby basket and rotate as your taste evolves.
Cost: $15–$25 per ledge; multiple ledges for a stacked arrangement look best.
26. Vintage Map or Blueprint Print
What it is: A large-format print of a historical map, architectural blueprint, vintage botanical illustration, or antique engraving — printed poster-size and hung in a simple frame or as an unframed poster with mounting strips.
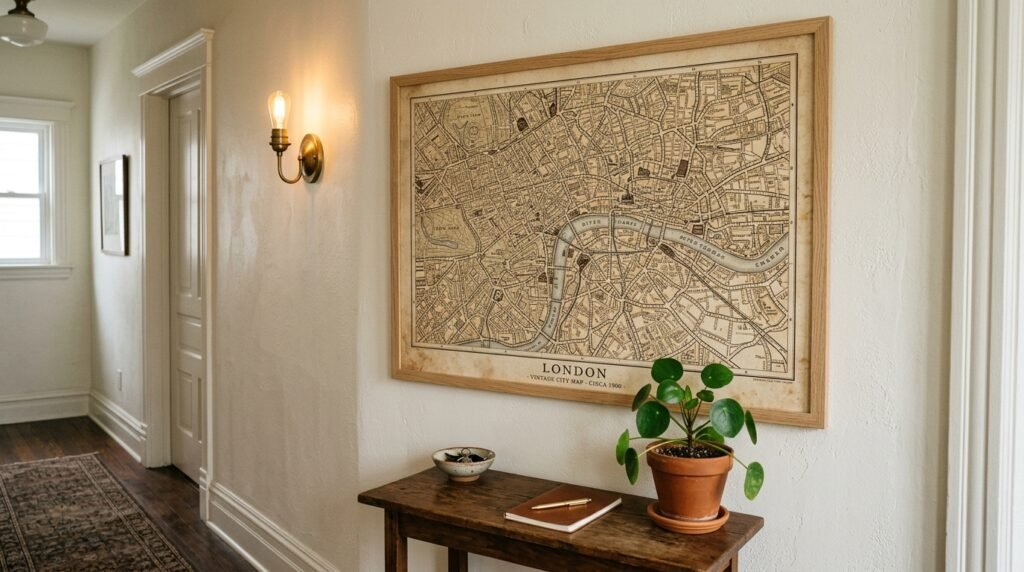
Why it works: Large-format historic prints have a gravitas and visual complexity that modern prints often lack. They’re also conversation starters — a detailed 1890 map of your city, a WWII-era aeronautical chart, a hand-drawn anatomical illustration — these carry genuine cultural weight.
Where to find them: The Library of Congress, David Rumsey Map Collection, and Etsy’s vintage map sellers all offer high-resolution files you can download and print yourself at a local print shop. A 24″x36″ poster print costs $10–$20 at most print shops.
How to hang it: Unframed posters with clean white borders look intentional hung with poster strips. For a more finished look, mount in a simple black or natural wood frame with Command strips.
Pro tip: The white border matters. Order with at least 1.5–2 inches of white space around the printed area — it acts as its own mat and makes the piece look framed even when it’s not.
Cost: $10–$30 to print; free to download from public domain archives.
27. Hanging Air Plant Display
What it is: Air plants (Tillandsia) mounted in geometric glass terrariums, woven holders, or driftwood frames and hung from Command hooks — bringing living, low-maintenance greenery to your walls.
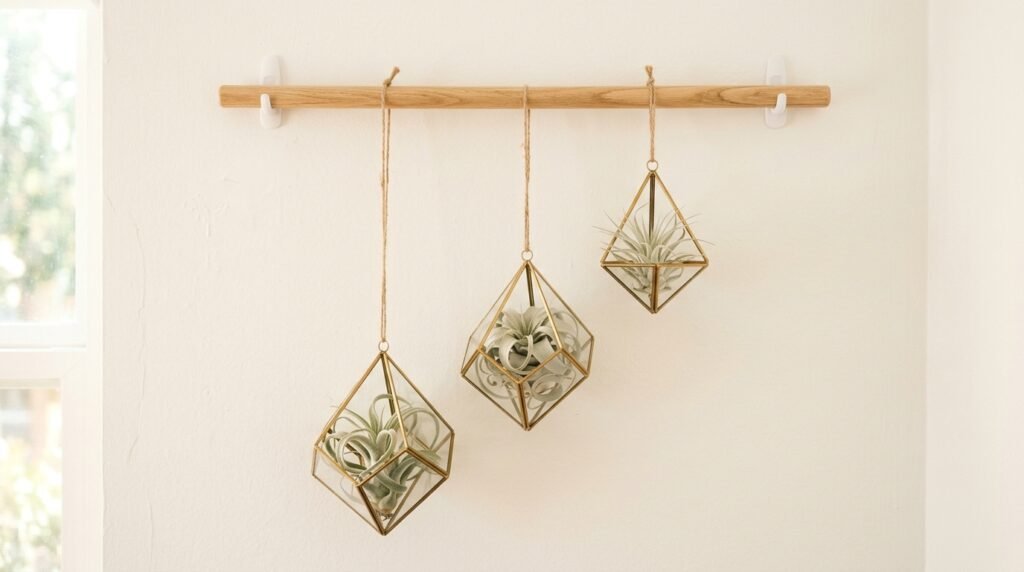
Why it works: Air plants require no soil, no pots, and minimal water (a weekly misting or monthly soak). They thrive in bright indirect light, they grow slowly enough to look the same for months, and they add organic life to a wall that a print never can.
How to hang: Glass geometric terrariums with a hook come ready to hang on a Command hook. Woven jute holders can hang from a decorative hook or dowel. For a more structural look, driftwood or branch displays hold multiple plants in a row.
Best Tillandsia varieties for wall displays: Ionantha (small, turns red when blooming), Xerographica (large, silvery rosette), Stricta (long, graceful leaves).
Pro tip: Group three air plants of different sizes and varieties together rather than hanging single plants in isolation — the arrangement reads as intentional decor rather than an experiment.
Cost: $5–$15 per air plant; $10–$40 per hanging display piece.
28. Bamboo or Rattan Wall Panel
What it is: A woven bamboo, rattan, or seagrass panel hung on the wall as a large, textured backdrop — often used as a headboard wall treatment or behind a dining area.
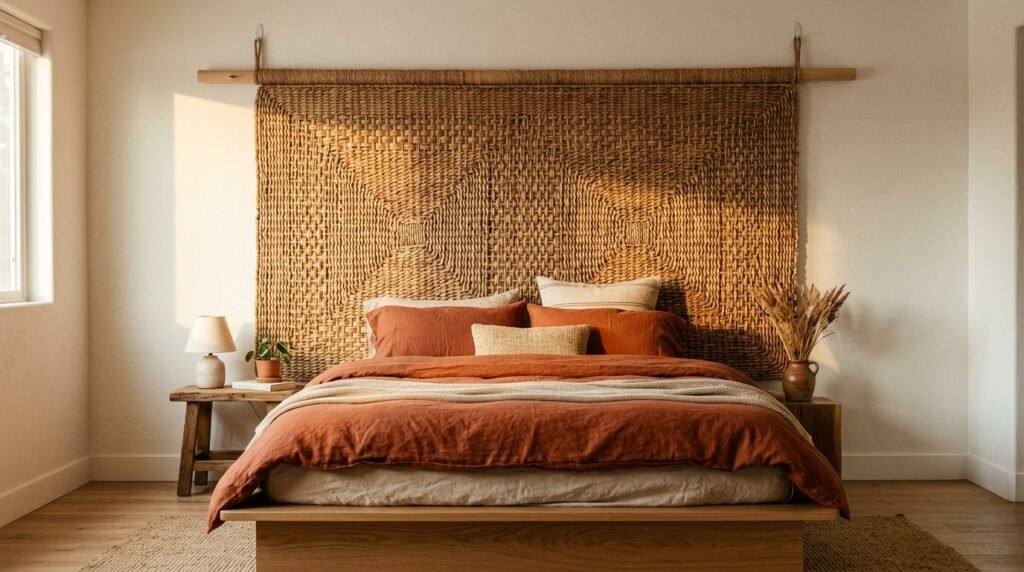
Why it works: Natural fiber panels add warmth and texture at a scale that’s hard to achieve with any other single element. They work as a room’s primary wall treatment — you may not need anything else on that wall once the panel is up.
How to hang: Most panels have a finished edge with a simple hanging rod sleeve. Thread a wooden dowel through and hang on two large Command hooks. For heavier panels, use a pair of picture-hanging strips at the top corners as supplemental support.
Best for: Bedroom headboard walls, living room focal walls, dining area backdrops.
Pro tip: Size up. A bamboo panel that fills 80% of a wall reads as intentional design. One that fills 40% looks like a window shade in the wrong place.
Cost: $60–$200 depending on size and material quality. Etsy and specialty home decor shops carry the best selections.
29. Tension Wire Art Display System
What it is: Vertical cables or horizontal wires tensioned between a floor plate and a ceiling plate (no wall drilling required) with moveable hooks and clips that let you hang art at any height along the wire.
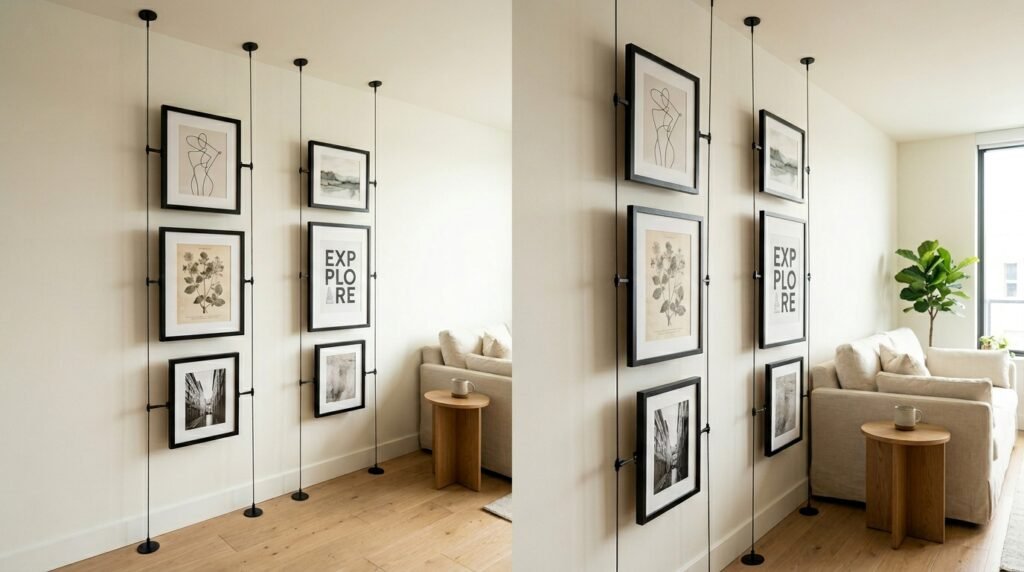
Why it works: Tension wire systems are the closest thing to a professional gallery wall system for renters. Because the tension runs floor-to-ceiling, no wall contact is needed at all — the system is entirely freestanding. You can hang heavy art, rearrange pieces in seconds, and take it all down when you move.
How to set it up: Look for systems from brands like Hang-Up Display or Artiteq. The floor and ceiling plates distribute force without marking either surface. Space wires 18–24 inches apart for a multi-piece display.
Best for: Large wall spaces where you want a professional-looking rotating art display — living rooms, home offices, studios.
Pro tip: Use matching, simple frames for a cohesive gallery effect. Tension wire systems can handle eclectic content, but they look most refined with a consistent frame style — all black frames, or all natural wood.
Cost: $80–$200 for a two-wire system; professional sets with multiple wires run $200–$400.
30. Fabric Wall Pocket Organizer
What it is: A fabric panel with multiple sewn pockets of varying sizes hung on the wall — functioning as both decor and storage for mail, notebooks, plants, small tools, or art supplies.
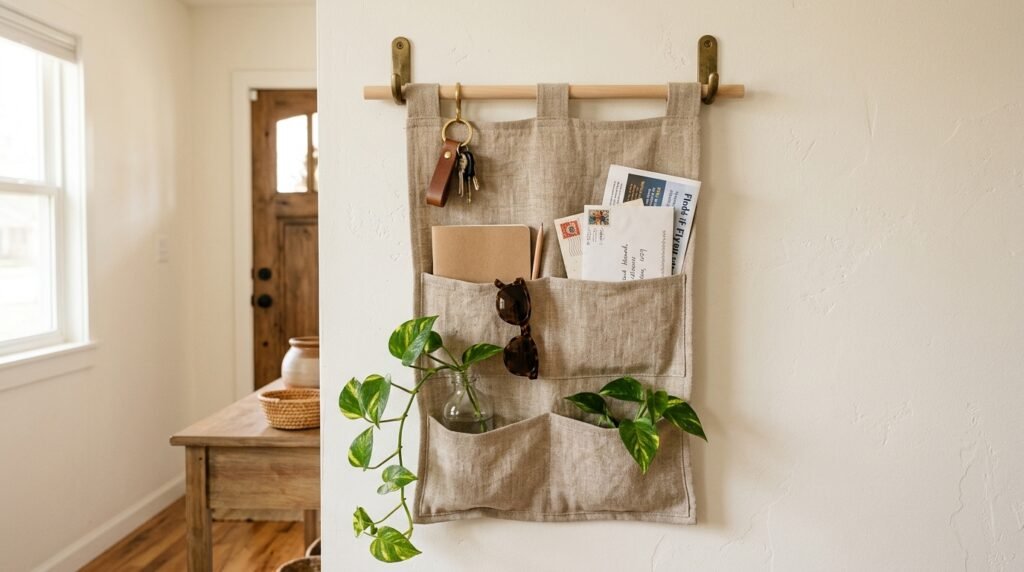
Why it works: In a small apartment where wall space is precious, a wall pocket organizer earns its place because it contributes to both the aesthetic of the room and its function. A well-made one in natural linen or canvas looks as intentional as a textile art piece.
How to hang it: Most come with a sewn-in rod pocket at the top — thread a wooden dowel through and hang from two Command hooks. The weight of the contents helps it hang flat against the wall.
Best for: Entryways (mail, keys, sunglasses), home offices (notebooks, chargers, pens), craft areas, plant stations.
Pro tip: Choose a pocket organizer in a neutral that matches your room’s palette — linen, natural cotton, or canvas in warm white or terracotta. Avoid overly busy patterns; the objects in the pockets provide the visual interest.
Cost: $30–$80 on Etsy for handmade options; $20–$40 for mass-produced versions.
31. Removable Tile Stickers
What it is: Self-adhesive vinyl tiles designed to mimic ceramic, encaustic, Moroccan, or geometric tile patterns — applied to a wall section to create a faux tile backsplash effect. Remove cleanly without residue.
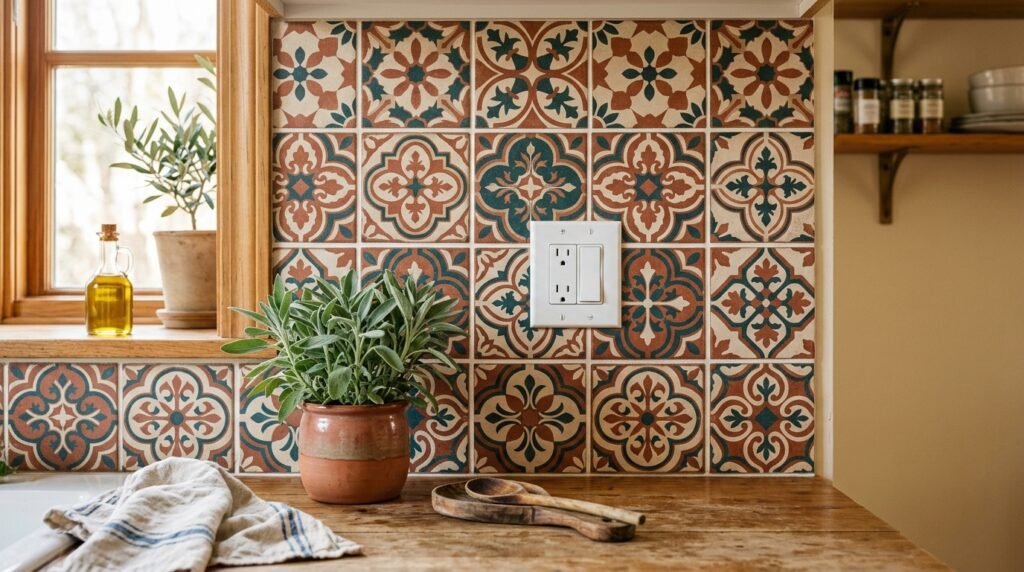
Why it works: A kitchen or bathroom tile backsplash is one of the most common ways to dramatically transform a space — and one of the most common things landlords won’t allow you to change. Tile stickers let you fake a beautiful custom backsplash that removes in an afternoon when you move out.
How to apply: Clean the wall surface thoroughly with rubbing alcohol. Apply from the center outward and use a squeegee to eliminate all bubbles. For kitchen use near a stove, make sure to use heat-rated vinyl — not all tile stickers are designed for heat exposure.
Best sources: Tile Club, Giffywalls, and TileStickers.com all carry design-forward patterns. Cement tile and encaustic geometric patterns look the most like real tile.
Pro tip: Cut carefully around outlets and switches using a craft knife and ruler — messy cutouts immediately reveal the sticker illusion.
Cost: $2–$5 per tile. A kitchen backsplash of 10–12 square feet costs $50–$150.
32. Plant Shelf Vignette (Bracket-Free)
What it is: A narrow plant shelf or tray placed on a windowsill, a furniture top, or a mantel-height ledge — styled with trailing plants that cascade down the wall, creating the impression of a living wall feature without attaching anything to the wall itself.

Why it works: Trailing plants — pothos, string of pearls, heartleaf philodendron — grow downward and outward. When positioned at height on furniture or a windowsill, they trail along the adjacent wall naturally, creating a living wall effect that requires zero hardware. The plant does the decorating.
How to set it up: Place a shelf unit, console table, or tall dresser near the wall you want to decorate. Add hanging planters on the top shelf and trailing plants in regular pots. As the plants grow, train them gently along the wall using small adhesive plant clips that pin to the wall surface without leaving marks.
Best plants: Golden pothos (nearly indestructible), heartleaf philodendron (fast-growing, full-looking), string of pearls (dramatic cascades), tradescantia (colorful and vigorous).
Pro tip: Water trailing plants slightly less than the recommended amount — slightly underwatered trailing plants cascade more dramatically than overwatered ones, which tend to stay compact and bushy.
Cost: $10–$25 per plant; the display furniture you may already own.
Thirty-two ideas, zero nail holes, and a security deposit that stays exactly where it belongs. You don’t need to do all of this — you probably shouldn’t. Pick the two or three ideas that solve your most pressing problem: a blank wall that embarrasses you, a room that still feels temporary, a space that doesn’t reflect who you actually are.
If you’re starting from scratch, begin with the gallery wall and a leaning mirror. If you want immediate atmosphere, get the string lights up tonight. If you’re ready to commit to a real transformation, the peel-and-stick wallpaper panel will change how you feel about your apartment every single morning.
Renting isn’t a reason to live in a space that doesn’t feel like yours. It’s just a constraint — and constraints are exactly where good design begins.